There’s something truly special about the humble potato, especially when it’s transformed into these delightful Stuffed Mashed Potato Nests. This recipe instantly became a favorite in our household — a perfect blend of cozy comfort and a little bit of fun on the plate. I love how these nests bring together creamy mashed potatoes and a surprise filling, making them feel like a mini celebration every time we sit down to eat. As a mom, I’m always on the lookout for dishes that are both kid-friendly and grown-up approved, and these nests hit that sweet spot perfectly.
Table of Contents
Why You’ll Love This Stuffed Mashed Potato Nests
What makes these Stuffed Mashed Potato Nests stand out for me is their versatility and the way they turn simple ingredients into a family favorite. First, they’re a fantastic way to make mashed potatoes exciting, especially for kids like Emma and Noah, who love the surprise of the filling inside. I also appreciate how easy they are to customize — whether you want to add cheese, veggies, or even a bit of bacon, they adapt beautifully. Finally, they’re a great make-ahead option for busy weeknights, giving you that homemade comfort without the stress.
Ingredients You’ll Need for This Stuffed Mashed Potato Nests
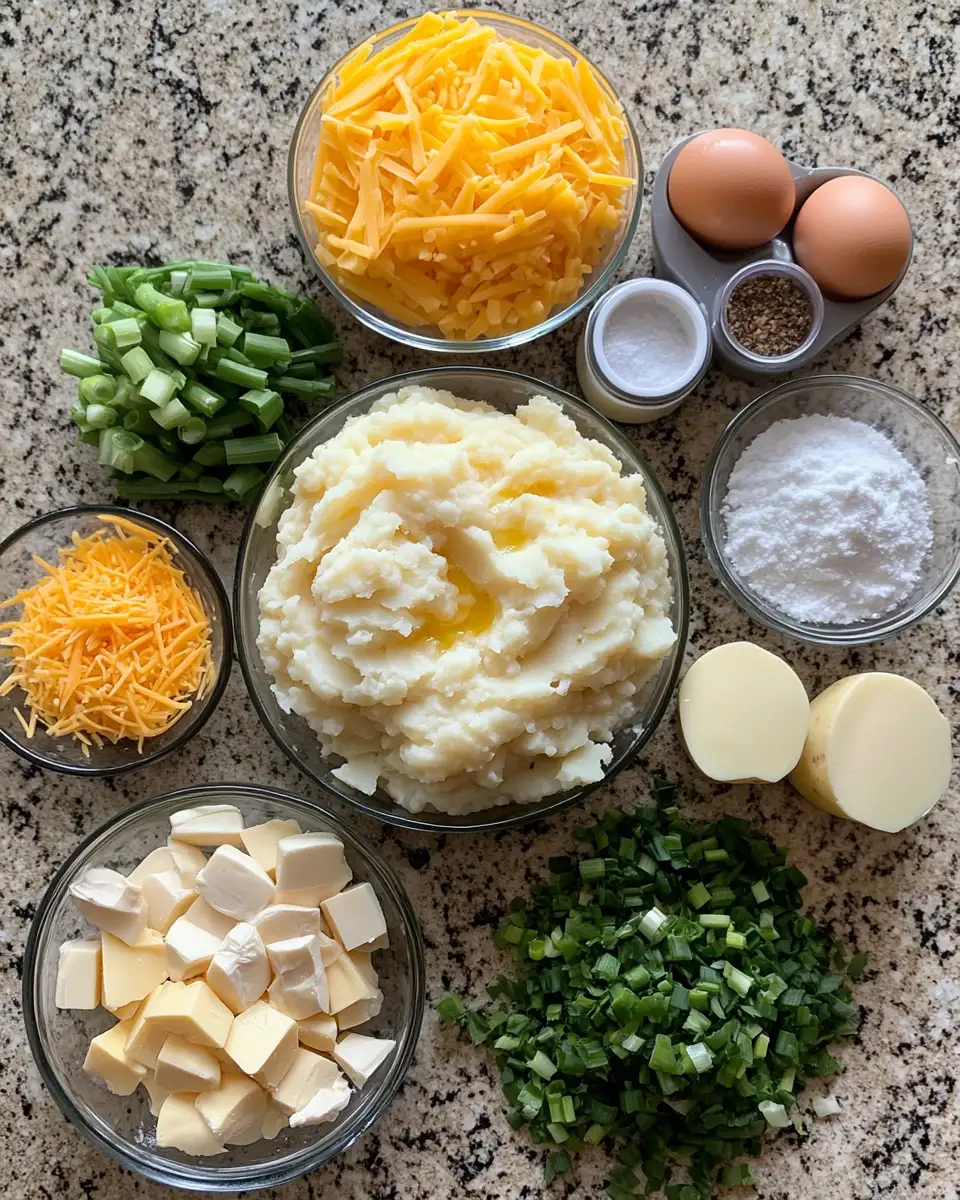
The key to this dish lies in selecting the right ingredients — fresh potatoes and quality fillings make all the difference. Growing up, my mom always emphasized using simple, wholesome ingredients, and that’s a philosophy I carry into my kitchen today. For these nests, creamy mashed potatoes are the base, so choose starchy potatoes like Russets or Yukon Gold for the best texture.
- 4 large Russet or Yukon Gold potatoes, peeled and cubed
- 1/2 cup sour cream or Greek yogurt (for extra creaminess)
- 3 tablespoons butter
- 1 cup shredded cheddar cheese (or your preferred cheese)
- 1/2 cup cooked and crumbled bacon or sautéed mushrooms (optional)
- 2 green onions, finely chopped
- Salt and pepper to taste
- 1/4 teaspoon garlic powder (optional)
- 1 egg, beaten (to help bind the nests)
If you’re looking for a vegetarian option, swapping bacon with sautéed mushrooms or roasted veggies works beautifully. And for a dairy-free twist, you can use vegan butter and dairy-free cheese alternatives without losing that comforting flavor.
Nutrition Facts
- Calories: Approximately 250 per serving (1 stuffed nest)
- Protein: 8g
- Fat: 12g
- Carbohydrates: 28g
- Fiber: 3g
- Sugar: 2g
- Sodium: 350mg (varies with added salt and bacon)
Irresistible Stuffed Mashed Potato Nests That Will Steal the Show
Learn how to make delicious Stuffed Mashed Potato Nests. Easy recipe with step-by-step instructions.
- Total Time: 45 minutes
- Yield: 4 servings 1x
Ingredients
The key to this dish lies in selecting the right ingredients — fresh potatoes and quality fillings make all the difference. Growing up, my mom always emphasized using simple, wholesome ingredients, and that’s a philosophy I carry into my kitchen today. For these nests, creamy mashed potatoes are the base, so choose starchy potatoes like Russets or Yukon Gold for the best texture.
- 4 large Russet or Yukon Gold potatoes, peeled and cubed
- 1/2 cup sour cream or Greek yogurt (for extra creaminess)
- 3 tablespoons butter
- 1 cup shredded cheddar cheese (or your preferred cheese)
- 1/2 cup cooked and crumbled bacon or sautéed mushrooms (optional)
- 2 green onions, finely chopped
- Salt and pepper to taste
- 1/4 teaspoon garlic powder (optional)
- 1 egg, beaten (to help bind the nests)
If you’re looking for a vegetarian option, swapping bacon with sautéed mushrooms or roasted veggies works beautifully. And for a dairy-free twist, you can use vegan butter and dairy-free cheese alternatives without losing that comforting flavor.
Instructions
- Preheat your oven to 375°F and line a baking sheet with parchment paper. This helps the nests crisp up nicely without sticking.
- Boil the peeled and cubed potatoes in salted water until tender, about 15-20 minutes. Drain well and return to the pot to dry out slightly over low heat for a minute or two.
- Mash the potatoes thoroughly, then stir in butter, sour cream, garlic powder, salt, and pepper until creamy and smooth. Let the mixture cool slightly before adding the beaten egg to prevent scrambling.
- Fold in half of the shredded cheese and green onions. This adds flavor and a bit of texture to the base.
- Use a spoon to scoop out portions of the potato mixture onto the baking sheet, shaping each into a nest with a little well in the center for the filling.
- Fill each nest with your choice of filling — crumbled bacon, mushrooms, or extra cheese work wonderfully.
- Top each nest with the remaining cheese and a sprinkle of green onions for color and flavor.
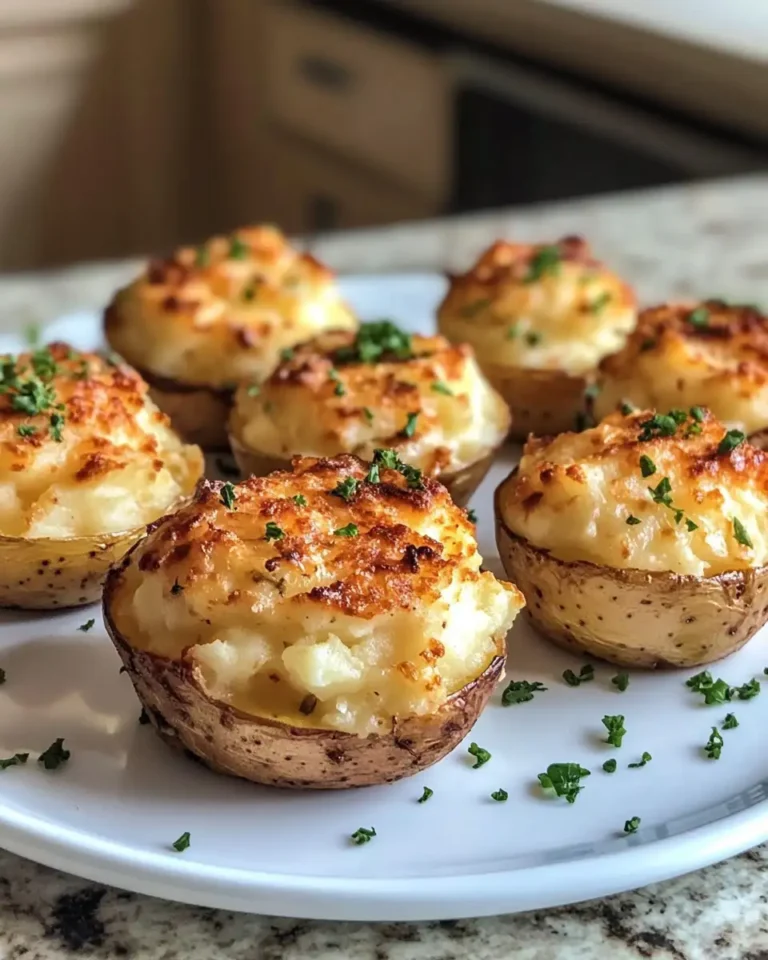
- Bake for 20-25 minutes, or until the nests are golden and the cheese is bubbly and slightly browned.
- Let them cool for a few minutes before serving. This resting time helps the nests hold their shape and makes them easier to eat.
- Prep Time: 15 minutes
- Cook Time: 30 minutes
- Category: Main Dish
- Method: Cooking
- Cuisine: International
Keywords: Stuffed Mashed Potato Nests, recipe, cooking, food
Steps to Create Your Stuffed Mashed Potato Nests
- Preheat your oven to 375°F and line a baking sheet with parchment paper. This helps the nests crisp up nicely without sticking.
- Boil the peeled and cubed potatoes in salted water until tender, about 15-20 minutes. Drain well and return to the pot to dry out slightly over low heat for a minute or two.
- Mash the potatoes thoroughly, then stir in butter, sour cream, garlic powder, salt, and pepper until creamy and smooth. Let the mixture cool slightly before adding the beaten egg to prevent scrambling.
- Fold in half of the shredded cheese and green onions. This adds flavor and a bit of texture to the base.
- Use a spoon to scoop out portions of the potato mixture onto the baking sheet, shaping each into a nest with a little well in the center for the filling.
- Fill each nest with your choice of filling — crumbled bacon, mushrooms, or extra cheese work wonderfully.
- Top each nest with the remaining cheese and a sprinkle of green onions for color and flavor.
- Bake for 20-25 minutes, or until the nests are golden and the cheese is bubbly and slightly browned.
- Let them cool for a few minutes before serving. This resting time helps the nests hold their shape and makes them easier to eat.
Tips for Making the Best Stuffed Mashed Potato Nests
Getting these nests just right is all about balance and technique — from the mash texture to the filling and baking time. Over the years, I’ve learned a few tricks to make these nests shine every time.
- Use starchy potatoes like Russets or Yukon Gold for the fluffiest mash that holds its shape.
- Don’t overwork the potatoes — mash until smooth but still a bit textured to avoid gluey nests.
- Cool the mashed potatoes before adding the egg to keep it from scrambling.
- Don’t skimp on seasoning — a little extra salt and garlic powder go a long way.
- Customize the filling based on what your family loves — we often swap bacon for caramelized onions or sautéed spinach for a veggie boost.
- Use parchment paper or a silicone mat to prevent sticking and help with cleanup.
With these tips, you’ll create a restaurant-quality dish every time. Learn more: Irresistible Stuffed Portobello Mushrooms
Serving Suggestions and Pairings

This dish is incredibly versatile and works beautifully for various occasions, whether it’s a cozy family dinner or a festive gathering. The nests look charming on the plate, making them perfect for impressing guests without fuss.
- Pair with a crisp, lightly dressed green salad to balance the richness.
- Serve alongside roasted chicken or a simple grilled steak for a hearty meal.
- For a vegetarian spread, complement with steamed green beans or roasted root vegetables.
- Try swapping the filling seasonally — pumpkin and sage in the fall or fresh herbs in the spring.
In our home, these nests often make an appearance on busy weeknights when I want to serve something comforting but still special. Emma and Noah love helping me stuff the nests, which turns dinner prep into a fun family activity.
Storage and Reheating Tips
Proper storage ensures you can enjoy leftovers just as much as the fresh dish, which is a lifesaver on busy days.
- Store leftover nests in an airtight container in the refrigerator for up to 3 days.
- Reheat gently in a 350°F oven for 10-15 minutes to maintain their crispness — avoid the microwave if you want to keep the texture.
- If reheating in the microwave, add a small splash of cream or milk to keep the mashed potatoes creamy.
- These nests can be made ahead and frozen before baking; bake directly from frozen, adding extra baking time.
Frequently Asked Questions
What are the main ingredients for Stuffed Mashed Potato Nests?
The main ingredients for Stuffed Mashed Potato Nests include the items listed in our ingredients section above. Each ingredient plays a crucial role in achieving the perfect flavor and texture.
How long does it take to make Stuffed Mashed Potato Nests?
The total time to make Stuffed Mashed Potato Nests includes both preparation and cooking time. Check the recipe card above for exact timing details.
Can I make Stuffed Mashed Potato Nests ahead of time?
Yes, Stuffed Mashed Potato Nests can often be prepared in advance. Store it properly in an airtight container in the refrigerator and consume within the recommended timeframe.
What can I serve with Stuffed Mashed Potato Nests?
Stuffed Mashed Potato Nests pairs well with various sides and accompaniments. Consider the serving suggestions mentioned in the recipe for the best dining experience.
Is Stuffed Mashed Potato Nests suitable for special diets?
Depending on the ingredients used, Stuffed Mashed Potato Nests may be adapted for various dietary needs. Check the ingredients list and consider substitutions as needed for your dietary requirements.
Final Thoughts
I hope you find as much joy in making and sharing these Stuffed Mashed Potato Nests as my family and I do. They’re more than a recipe — they’re a way to bring warmth and a touch of magic to your table. I’d love to hear how your nests turn out, so don’t hesitate to share your stories and tweaks in the comments below. Happy cooking!